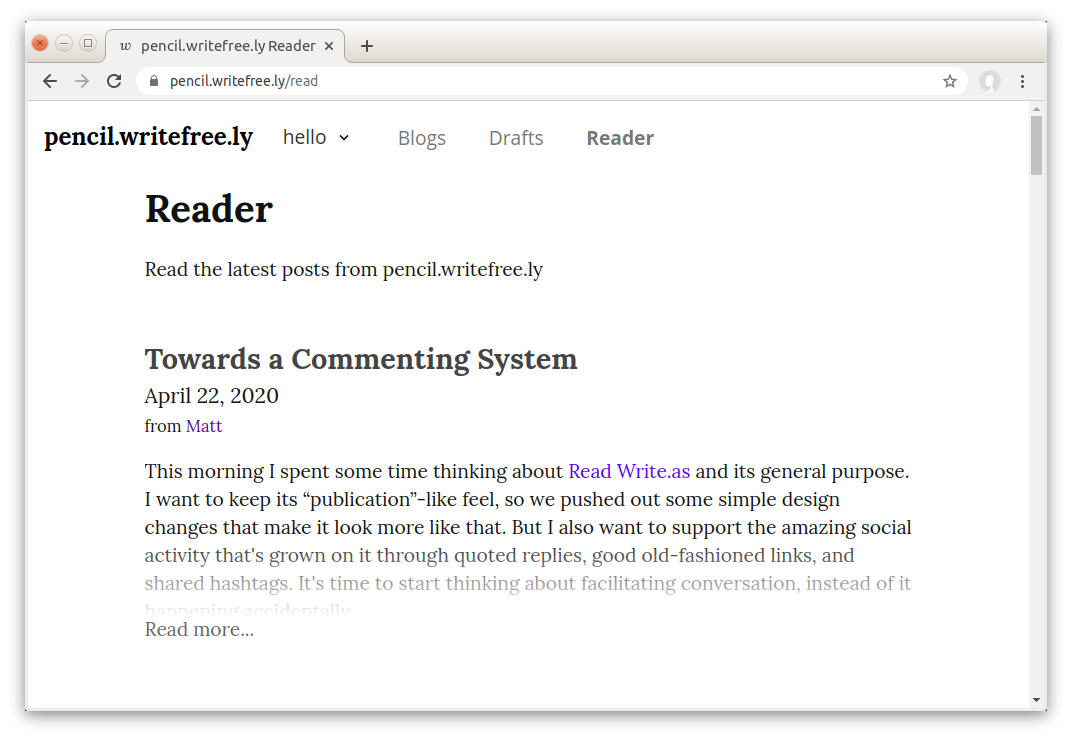
如何在写意正确地给文章添加标题
Writefreely 所使用的 Markdown 是一种轻量级标记语言。
要创建标题,请在单词或短语前面添加井号 (#) 。# 的数量代表了标题的级别。例如,添加三个 # 表示创建一个三级标题。
因此,给文章添加标题只需要在文章的第一行写下标题,并在最前面添加一个井号 # (也就是一级标题)即可。
例如:
# 这是一个标题

这是文字
学习更多 Markdown 编辑格式,请参阅《基本语法》
Writee管理员
Writefreely 所使用的 Markdown 是一种轻量级标记语言。
要创建标题,请在单词或短语前面添加井号 (#) 。# 的数量代表了标题的级别。例如,添加三个 # 表示创建一个三级标题。
因此,给文章添加标题只需要在文章的第一行写下标题,并在最前面添加一个井号 # (也就是一级标题)即可。
例如:
# 这是一个标题
这是文字
学习更多 Markdown 编辑格式,请参阅《基本语法》
本文整理了一些反监视自我保护入门工具,希望能帮助到身处中国(或身在海外但仍有回国可能)的站长们。如需深入了解,请查阅本文末尾的参考资源。
敬请注意,保持匿名和安全不仅仅是一个技术问题。没有任何工具足以保证你的安全。匿名是一个复杂的问题,没有一个简单的解决方案。任何薄弱环节都会让你的安全措施功亏一篑。你知道的越多,你就越安全。
加密你的硬盘
如果计算机被物理访问,即使设置了系统登录密码,硬盘内的未加密数据仍可被获取。对于您的笔记本电脑或台式机,可以使用操作系统的自带软件加密硬盘。
一个独立的操作系统可以为敏感操作提供安全的环境,这样您可以匿名,不留痕迹地使用软件,这些软件无法轻易获取您的真实设备型号和IP地址。一切与你的网站相关的操作都应在这个隔离环境中执行。
站长应避免使用个人移动设备管理或访问自己的网站。
如果不使用上述虚拟机环境,而在当前的操作系统操作,推荐以下浏览器:
浏览器的选择
mozilla.org 而不是 firefox.com.cn
浏览器拓展
测试浏览器
随机生成强密码并安全地存储它们,每一项服务使用的用户名和密码都应保持不同。
请不要使用任何机场或商业VPN服务。90%的VPN网站在跟踪记录你的一举一动。位于中国运营的机场也已屡屡发生运营者被逮捕,交出所有用户数据的事件。
更可控的做法是购买一台VPS服务器,自行搭建。
建站全过程需避免提供任何可以追踪到你的个人信息。
Email提供商
为你建站过程中所有需要email注册的服务建立一个独立的email账户。
Email转发/别名服务
如果你不想注册一个新的email账户,可以使用别名/匿名电子邮件转发服务来注册一切建站服务,帮助你隐藏真实的邮件地址。
制造分身
Cryptocurrency
避免使用支付网关位于中国的支付方式,如支付宝等。尽量选择使用国际银行卡支付,或者选择支持 Cryptocurrency 作为支付方式的建站服务商
顶级域(后缀)的选择
不要选择位于中国的域名注册商;不要选择域名注册局位于中国的顶级域,例如 .cn/ .ren /.top /.xin /.wang /.hk /.mo 等(完整列表见IANA Root Zone Database)
一些支持 Cryptocurrency 作为支付方式的域名注册商
同样,不要选择位于中国的托管服务商,即使服务器位于境外。
一些支持 Cryptocurrency 作为支付方式的服务器托管商
如果你的站点控制面板、服务商的控制面板都两步验证功能,请开启它们。
例如,长毛象的两步验证开启页面位于 /settings/two_factor_authentication_methods
两步验证工具
站长自我保护
参考资源
以下是一些我使用过的SMTP邮件发送服务,给Mastodon等实例站长建站作参考:
专用于发送 Transactional Email 的商业服务,本方案的优点是发件稳定。
借用支持SMTP协议的邮箱发送邮件,本方案成本低,但可能受限于邮箱服务的提供商的管控。
因安全风险和维护成本较高,一般不推荐此方案。如果动手能力强,有一台不用于任何其他用途的VPS,且IP地址没有被反垃圾邮件列表黑名单,有时间维护,可以考虑自建:
在你的站点上配置完成后,在 mail-tester.com 测试,分数超过8分就差不多了。
TL;DR:
Key reasons why you should block Mao (aka: Daizhige, domain: *.mastodonhub.com) Mastodon instances:
Mao (mao.mastodonhub.com) has been duplicating at least hundreds of Mastodon accounts from Pawoo.net and other instances to its own instance without the permission of the original account owners.
To find out whether your account has been duplicated, you can type “mao.mastodonhub.com/@yourmastodonhandle” in the address bar. Replace your_mastodon_handle by your account handle.
The mirror accounts have been cached from the Fediverse since 2018 and generated by processing in the background of Mao's server. To validate this theory, someone built a test server and successfully replicated this process – those accounts were deliberately mirrored and were not created by mistake.
One of the distinguishable differences between the mirrored accounts and the original accounts is that the <p> and <br> tags are retained in the mirrored accounts.
Example of an account mirrored from Pawoo.net :

On December 13, 2020, Mao's admin made an announcement stating that he refuses to take any responsibility or proactively delete these fake accounts. If users want to delete the mirrored accounts and contents, they need to contact Mao's admin and make a request.
Mao openly advertises its own instance as the only Chinese instance, and all other Chinese instances are branches of its site. They are intentionally misleading new users who have not known Mastodon's decentralization mechanism.
In its user guide, Mao claims itself to be the “largest Chinese mastodon instance” and uses “嘟嘟长毛象” (Toot, Mastodon) to name the mobile apps they developed, thus creating a false image of themselves as the “official Mastodon platform”, without mentioning that the most important feature of mastodon is the decentralized private instances, and so called “official platform” simply doesn't exist.
In early 2020, Mao had it servers located in Beijing, China mainland.
On May 25, 2020, Mao suddenly shut down its service (for unjustifiable reasons) without properly informing users in advance. The instance was shut down only 30 minutes after Mao's announcement, leaving its users no time for backups.
The instance went live again in July 2020 and moved its servers to Hong Kong.
Mao published a list of instance info (including alternate domains that are used to circumvent the Chinese Great Firewall) on Weibo (Chinese social media), which is heavily censored by the Chinese government. This would very likely jeopardize those instance admins who live in China.
Mao intends to sell its Mastodon hosting service through subdomains of mastodonhub.com.
Based on an analysis of its ICP license and IP addresses, it appears that Mao is controlled by, or at least affiliated with, a China-based public company with registered capital of ¥18,250,000 and total operating revenue of ¥24,542,198 in FY 2019.
Mao created a microblog-like, non-open source proprietary Mastodon App which requests for unnecessary permission that may potentially violate user's privacy. It also advertised only its own instance in the app interface when it was published.
Mao's terms of service does not clearly define its terms or privacy policy.
It also outlines that the admins can do whatever they want and they don't accept any criticism. If you disrespect the admin, your account will get deleted.
Mao censors and deletes user-posted contents and accounts in favour of the Chinese Communist Party (CCP).
Known instances of Mao:
– mao.mastodonhub.com (main site) – test.mastodonhub.com – daizhige.mastodonhub.com – moyu.mastodonhub.com – meow.mastodonhub.com – outerspace.mastodonhub.com
Known server IPs:
– 148.66.58.42, 148.66.57.10
Block by user agent (Nginx):
    # Block MAO UA
      if ($http_user_agent ~* "mastodonhub.com") {
            return 403;
       }
Block IPs in Nginx:
    # Block MAO IP
      deny 148.66.58.42;
      deny 148.66.57.10;
Block with iptables:
    iptables -A INPUT -s 148.66.58.42 -j DROP
    iptables -A INPUT -s 148.66.57.10 -j DROP
WriteFreely是免费的开放源代码软件,可用于在Web上构建写作空间——无论是出版物,内部博客还是与联邦宇宙互通的写作社区。
WriteFreely建立在一个简洁的、会自动保存的编辑器上,可为您提供无干扰的书写环境。一经发表,您的文字便成为中心话题,而且易于阅读。
你可以发表公开或私有的作品,与其他 WriteFreely 和联邦宇宙社区联系:包括无论是运行WriteFreely,Plume还是其他受ActivityPub支持的软件。借助我们的OAuth 2.0支持,您可以从第三方平台上加入会员。
你可以通过标签将文章分类,并通过将普通文章固定/置顶到您的博客来创建静态页面、创建草稿并通过一个帐户发布到多个博客。
Blog元素已本地化为20多种语言,并且WriteFreely包括对非拉丁语和从右至左(RTL)脚本语言的一流支持。
WriteFreely收集最少的数据,并且永远不会超出作者的同意进行公开。作者可以从一个帐户无缝创建多个博客,以实现不同的笔名或目的,而无需公开透露其关联。
WriteFreely作为静态二进制文件,可以部署在Go支持的任何平台和体系结构上。只需使用内置的SQLite支持,或添加一个MySQL数据库,就可以运行WriteFreely啦!
对于常见平台,请从WriteFreely的预编译二进制文件开始。可以参考WriteFreely的官方安装指南。
以上介绍译自 WriteFreely 的 Github。
本文以 Ubuntu 18.04 为例,进行搭建。
切换到 root 用户:
sudo -i
安装 Nginx 网站服务器:
sudo apt install nginx -y
安装 MySQL 数据库:
sudo apt update
sudo apt install mysql-server -y
sudo mysql_secure_installation
进行 sudo mysql_secure_installation 步骤时,会要求设置MySQL的root用户密码。
检查MySQL 数据库服务器的运行:
sudo systemctl status mysql.service
输入刚才设置的root密码登录:
sudo mysql -u root -p
创建WriteFreely的数据库和数据库用户,这个例子中,我们的数据库名称和用户名都是 writefreely。不要输入最开始的 mysql > 部分:
mysql > CREATE USER 'writefreely'@'localhost' IDENTIFIED BY '数据库密码';
mysql > CREATE DATABASE writefreely;
mysql > GRANT ALL PRIVILEGES ON writefreely . * TO 'writefreely'@'localhost';
mysql > FLUSH PRIVILEGES;
mysql > exit;
在官方发布页面中,找到最新的版本。此处以 v0.12.0 为例。
下载之前,先判断自己的VPS架构,来确定下载哪个版本:
uname -a
dpkg --print-architecture
这个例子里,我们下载 v0.12.0 的 amd64 版本:
wget https://github.com/writefreely/writefreely/releases/download/v0.13.2/writefreely_0.13.2_linux_amd64.tar.gz
tar xvzf writefreely_0.13.2_linux_amd64.tar.gz -C /home
WriteFreely程序被安装在了 /home/writefreely 目录下。
执行以下命令进行首次配置
cd /home/writefreely
./writefreely --config
我选择的是 Production, behind reverse proxy 安装模式,用 Nginx 反代本地 8080 端口的WriteFreely。
Public URL 需要设为你最终公开使用的域名,比如 http://writee.org
具体的配置选项说明,请参考官方文档的配置文件部分。
未来如果需要修改配置文件,可以直接在后台修改,或者手动修改 config.ini 文件后,重启 WriteFreely 进程。
初始化,生成 key:
./writefreely --init-db
./writefreely --gen-keys
创建管理员用户:
./writefreely --create-admin 用户名:密码
新建文件:
sudo nano /etc/systemd/system/writefreely.service
在该文件内填入:
[Unit]
Description=Write Freely Instance
After=syslog.target network.target

[Service]
Type=simple
StandardError=syslog
WorkingDirectory=/home/writefreely
ExecStart=/home/writefreely/writefreely
Restart=always

[Install]
WantedBy=multi-user.target
/home/writefreely 是你的程序安装路径。
设置开机启动:
systemctl daemon-reload
sudo systemctl start writefreely
sudo systemctl enable writefreely
如果WriteFreely启动失败,检查:
sudo journalctl -f -u writefreely
如需重启WriteFreely:
sudo systemctl restart writefreely
新建配置文件:
sudo nano /etc/nginx/sites-available/writefreely
填入以下内容(注意将域名改为你的域名):
server {
    listen 80;
    listen [::]:80;

    server_name writee.org;

    gzip on;
    gzip_types
      application/javascript
      application/x-javascript
      application/json
      application/rss+xml
      application/xml
      image/svg+xml
      image/x-icon
      application/vnd.ms-fontobject
      application/font-sfnt
      text/css
      text/plain;
    gzip_min_length 256;
    gzip_comp_level 5;
    gzip_http_version 1.1;
    gzip_vary on;

    location ~ ^/.well-known/(webfinger|nodeinfo|host-meta) {
        proxy_set_header Host $host;
        proxy_set_header X-Real-IP $remote_addr;
        proxy_set_header X-Forwarded-For $remote_addr;
        proxy_pass http://127.0.0.1:8080;
        proxy_redirect off;
    }

    location ~ ^/(css|img|js|fonts)/ {
        root /home/writefreely/static;
        # Optionally cache these files in the browser:
        # expires 12M;
    }

    location / {
        proxy_set_header Host $host;
        proxy_set_header X-Real-IP $remote_addr;
        proxy_set_header X-Forwarded-For $remote_addr;
        proxy_pass http://127.0.0.1:8080;
        proxy_redirect off;
    }
}
将配置文件映射到 /etc/nginx/sites-enabled/writefreely:
ln -s /etc/nginx/sites-available/writefreely /etc/nginx/sites-enabled/writefreely
测试配置文件是否有错误:
nginx -t
生效新的配置文件并运行 Nginx,开机启动:
sudo nginx -s reload
sudo systemctl start nginx
sudo systemctl enable nginx
开启VPS的80/443端口:
ufw allow 80
ufw allow 443
sudo iptables -A INPUT -p tcp --dport 80 -j ACCEPT
sudo iptables -A INPUT -p tcp --dport 443 -j ACCEPT
请参考 Certbot 的官方步骤。
以 Ubuntu 18.04, Nginx 为例:
sudo apt-get update
sudo apt-get install software-properties-common
sudo add-apt-repository universe
sudo add-apt-repository ppa:certbot/certbot
sudo apt-get update
sudo apt-get install certbot python3-certbot-nginx -y
sudo certbot --nginx